MediaWiki Installation
MediaWiki is a content publishing platform ideally suited towards instances where you need to publish content online (like educational resources or support documentation) with the ability for other users to login and edit the content. Websites like Wikipedia make use of MediaWiki. You should find the installation and setup process fairly easy to follow.
It should be emphasised that MediaWiki does not integrate directly with RapidWeaver (it is not a theme or a stack). This is intended as an "add on" to your website, like an education website hosted as a sub-domain to your main website.
Downloading MediaWiki
MediaWiki is software that you install on your web hosting server. You host the wiki yourself. It's free to download and use. MediaWiki makes use of your existing disk space and bandwidth quota.MediaWiki can be downloaded from the MediaWiki website. Follow the download links shown on the homepage, and download the latest, most stable version.
MediaWiki downloads to your computer as a compressed
tar.gz file. Double-clicking this file uncompresses the package and displays a folder. Drag this folder (in its entirety) to your desktop or another suitable location on your computer.Setting up a space to host MediaWiki
MediaWiki works best if you create a sub domain. So if for example your website address washttps://example.com it may make things easier to create a sub domain at https://wiki.example.com. Sub domains can be setup in your web hosting CPanel, and there are already support articles available elsewhere on how to create subdomains. You'll find that using subdomains makes the installation process easier and helps keep thing organised more tidily.Uploading the MediaWiki files
Once you have a directory or subdomain setup, you can upload the MediaWiki files. These files can be uploaded using the File Manager in CPanel, or you can use FTP or SFTP. In the MediaWiki folder, upload all of the files and folders like docs, extensions, images, index.php and such like. All of these individual files form the MediaWiki software.Installing MediaWiki
Using your web browser (like Safari, Chrome or Firefox) navigate to the directory or subdomain where you uploaded the MediaWiki files. The index.php file should load for you automatically. You'll be presented with a screen that looks like the one below.

This screen simply means that WikiMedia is not installed. So click on the setup the wiki link to begin. To start the installation, you'll be asked to set your language the the language of the wiki site you are building:

After clicking the continue button, MediaWiki will run some tests to make sure your hosting account is compatible. Warnings can normally be ignored. Errors (marked in red) probably want attention before you can continue with installation. Click continue when done.

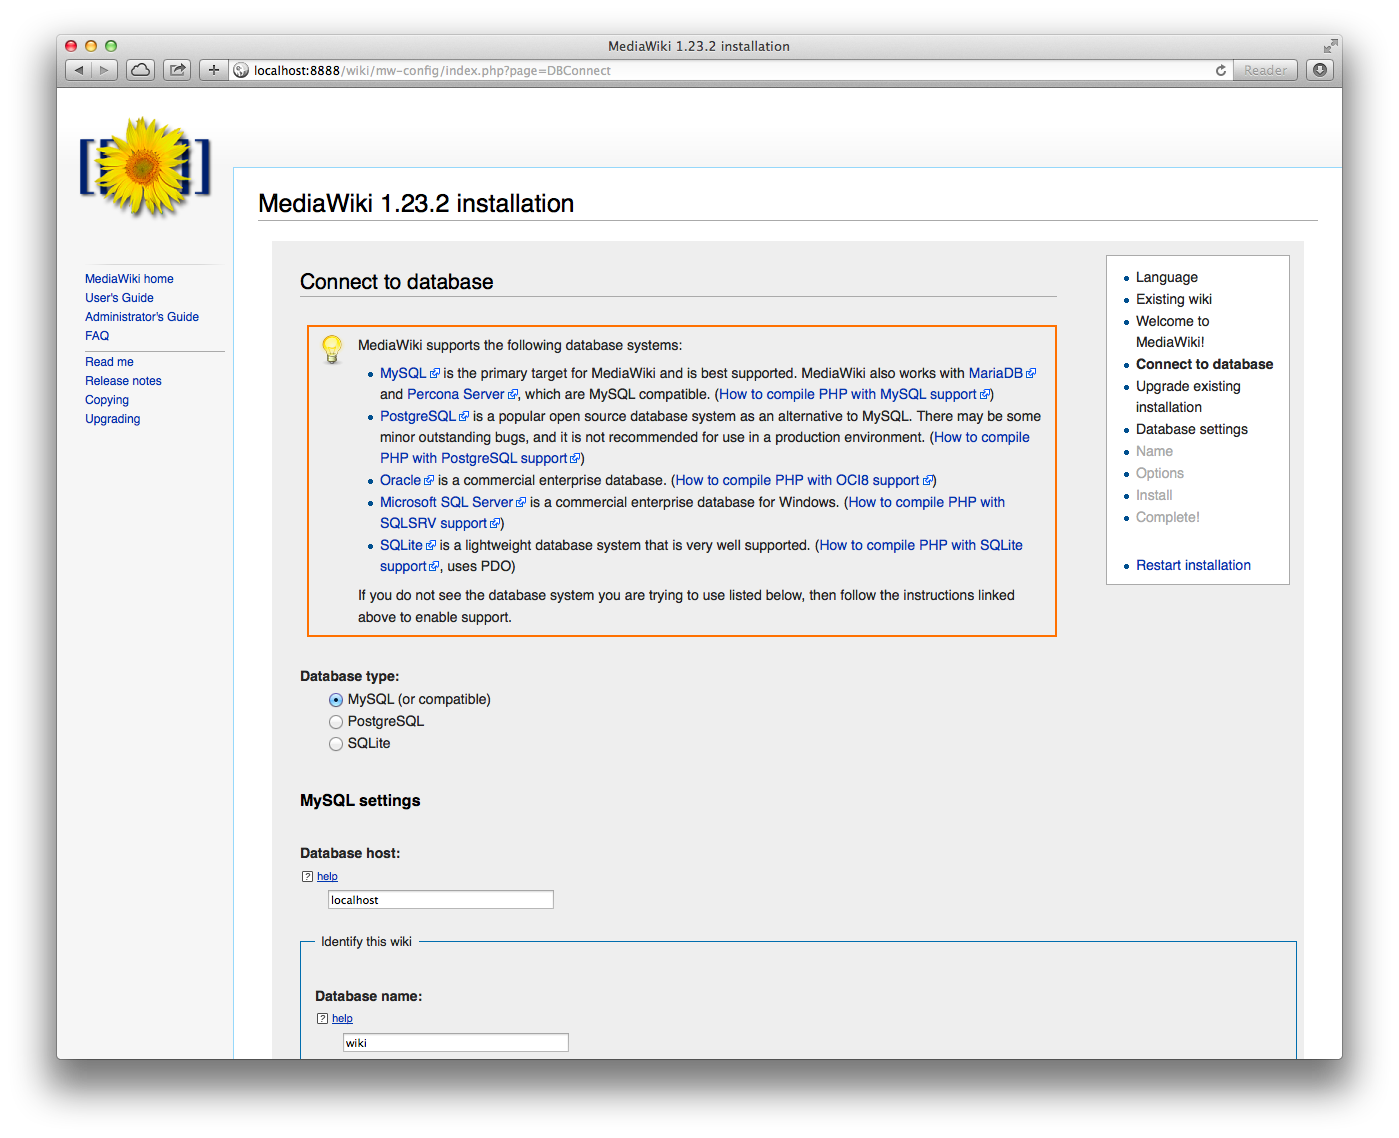
Now you will be asked for the MySQL database details. If you have not already setup a MySQL database to store your wiki content in, you should do so now. Knowledge base articles already exist on how to setup MySQL databases in your CPanel (using the MySQL Wizard) if you're unsure. Enter the database details carefully in the boxes shown:
The database settings on the next screen can be left as they are for a normal installation. These only ever really need to be changed if you're doing something special with your wiki. So these can often be left as they are and you can continue.

Enter the name of your wiki and the details of the first admin user. As always, a strong password is recommended for better security. Namespace settings can normally be left as they are.

At this point you can often skip the rest of the settings. Most of the other settings are provided for corner-case scenarios and specialist setups.

Click on the continue button to install MediaWiki. It may take several minutes for MediaWiki to install. Don't refresh the page or click your browser back button! When done, you'll be presented with a screen like the one shown below. Click continue when done.

When installation is complete, you will be given a file named LocalSettings.php. This is an important configuration file that unlocks your wiki and makes it available. Download this file and upload it to the same directory or subdomain where you installed MediaWiki earlier on. Without this file, your wiki will not work.

Once your LocalSettings.php has been uploaded, click on the continue link. You'll now be taken through to your wiki.
